Are you still managing your Minecraft server without a permission management plugin? Did you know that giving out OP is actually dangerous? You should change that!
With LuckPerms, it’s easier than ever to secure your server from unwanted players who might exploit your trust. Let me guide you through the first steps to a secure permission setup on your Minecraft server today!
How to get LuckPerms running?
Where and How to install LuckPerms
Installing LuckPerms is easy. First, head to the plugin page on Modrinth.com and download the .jar file to your PC. Be sure to select the correct Minecraft version and choose Paper as your platform.
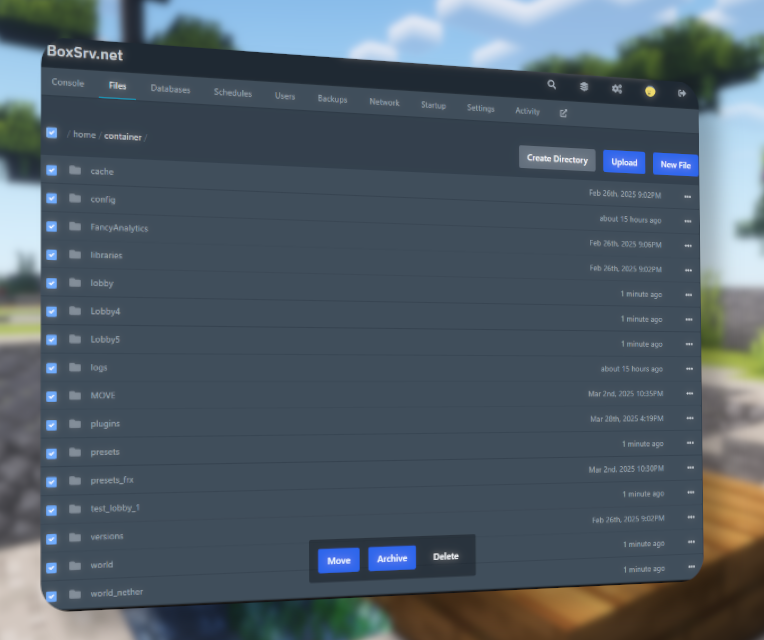
Next, go to your Server Panel. Open your desired server, navigate to the server files, and open the “plugins” folder. Click the Upload button and select the .jar file you just downloaded.
How to open the LuckPerms Web Editor
After restarting your server, check if LuckPerms is installed correctly:
- Use
/lpto display the currently installed LuckPerms version. - Use
/pluginsto confirm that LuckPerms shows up in green.
Now, open the Web Editor by typing /lp editor. LuckPerms will generate a unique session link. Treat this link like a password—it gives access to your server’s permission setup.
Setting Up Basic Ranks and Permissions
Let’s plan ahead. Your Minecraft server probably needs a few ranks (LuckPerms refers to ranks as groups). We’ll set up the following:
- Owner
- Admin
- Moderator
- Player
Creating Ranks
Click the small + icon next to “Groups”. Fill in the group name and optionally the display name. Let’s start with the Owner group:
- Set the weight to 100.
- Click the green New Group button.
Under the “Groups” tab, you should now see both the default and “Owner” group. A green background and small “N” indicate new changes. On the right, you’ll see the permission nodes such as display name (if set) and weight.
Typically, the Owner has all permissions. In the “Add permissions” box, type *, press Enter, then click ADD. This gives the Owner full access.
Admin Rank
- Create a new group named Admin.
- Set the weight to 99.
- Add the permission:
minecraft.command.ban.
Moderator Rank
- Create a group named Moderator.
- Set the weight to 98.
- Add the permission:
minecraft.command.kick.
Tip: In the Admin group, add the Moderator group as a parent group. This way, Admins inherit all Moderator permissions automatically.
Player Rank
You don’t need to create a separate Player group—we’ll use the default group.
- Add a permission node:
weight.0.
Applying the Changes
Click Save in the upper right corner. If the editor asked you to “Trust this session” and you did, your changes are already saved. If not, it will give you a command to apply the edits—copy it and run it in-game.
Giving out Ranks to Players
Setting a rank for a player is easy. Open your Minecraft client and type the following command in chat:
/lp user <Name> parent set <Rank>
Example:
/lp user DerSimplex parent set Owner
Setup Complete!
Now your Minecraft server has a proper permission system in place! You no longer need to hand out dangerous OP permissions. With LuckPerms, you’re in control—safe, scalable, and simple.